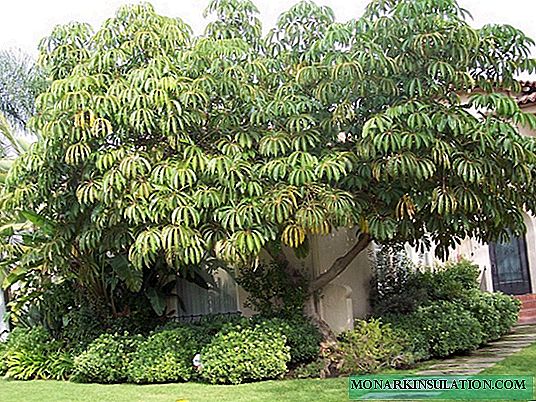
The desire of mankind to do everything “quickly” was reflected in such painstaking garden art as topiary. The formation of a bizarre crown of a tree, sometimes requiring decades, now takes no more than a few months. Who has so simplified the hard work of a gardener? As usual, the most hasty nation in the world. Trying to swallow the next batch of fast food with lightning speed, some of the Americans figured out how to make fast topiary quickly and easily. Growing an intricate green figure, thanks to sparkling thoughts from across the ocean, is now easier than ever - you do not need to wait for years until the tree grows and then cut it for a long time to achieve a certain crown configuration. It is enough to just purchase a finished wire frame, fill it with an earthen mixture, plant ground-cover plants, and voila! The topiary is ready. Curious? To be continued…
The desire to diversify our life encourages us all to search for an exciting activity designed to paint monotonous everyday life in bright colors. If your addiction is a garden, why not transform your garden plot into an original plant figure - a duck or a peacock, an elephant or a lion ... or maybe you prefer a flower car? The ancient art of topiary, redrawn in a modern way, will allow you, without straining, to create a topiary with your own hands literally within one day. Of course, provided that you did not plan to do something large-scale, striking in its dimensions, the owners of nearby land. To begin with, it is better to try your hand at creating a small garden figurine using the “topiary” frame technique, gradually moving to more complex compositions.
Technique # 1 - topiary on the finished frame
To learn how to make a topiary with your own hands with the help of a finished metal frame, the strength of any gardener with adequate patience and perseverance. First, you need to choose a frame for the future green sculpture. Its size and shape should harmoniously fit into the garden landscape. It is better to take a small but expressive form - after all, you create an accent that is simply obliged to attract attention to yourself.

An expressive green sculpture based on Formula 1 is made of ground cover plants based on the skeleton

Exotic ostriches created on the basis of spherical topiary bushes will bring a touch of extravagance to your garden
Finished frames, which can be purchased in specialized garden stores, are made of 2-3 mm wire. They are a lattice structure with sufficient gaps to penetrate. In addition, there is a lid in the upper part of the frame, which is designed to simplify access to the “inside” of the metal structure when it is filled with a substrate - a mixture of land with peat or with moss sphagnum.
Before you start filling the frame, moss should be soaked in warm water for about 30 minutes. Filling the structure of the future topiary with a substrate, it is necessary to prudently create holes in which ground cover or curly, succulent or grassy garden crops are then planted. For such purposes, they are perfect: juvenile, saxifrage, sedum, loosestrife, ivy, grapes.
When forming a topiary from weaving plants, an earthen lump moves from a plastic container into a metal mold, and the shoots are distributed along the frame and are caught by U-shaped clips. If the figure is to create a topiary of medium or large size, to facilitate its weight, bags with crushed foam are placed inside the substrate.

The fluffy hedgehogs that were born thanks to the frame topiary will decorate the green lawn in your area

A nice family of pigs made on the basis of the frame and ground cover plants will create an unusual flavor in the garden
Caring for frame topiary involves regular watering and top dressing, pinching and pruning. It should be remembered that such a green sculpture should not be left to winter in the open air - it is better to bring it into an unheated room with an air temperature of about 5 degrees. If the weight or volume of the topiary does not allow this, you can cover it with wooden, insulated straw or foam, a box.

Topiary in the form of an elephant under the power of experienced masters of green sculpture
Technique # 2 - espresso topiary
In an effort to further accelerate the process of creating a green sculpture of complex shape, an express topiary was invented. The essence of this method of forming topiary is simple - in spring, weaving plants such as periwinkle, girl's grapes, ivy or hops are planted in open ground, which tend to quickly form shoots.
Then, on top of the planting, a metal mesh frame is installed, which serves as the basis for creating the topiary. As they grow, the branches of plants are distributed along the frame and are fixed with a rope of natural material or trimmed. By the end of the season, the frame will overgrow, the metal rods will completely disappear under the green cover - you just need to remember to water and feed the topiary.

Only a couple of months will pass and the frame of the retro car will turn into a green sculpture of unprecedented beauty

The pyramidal shapes of the trees, created using the topiary technique, give the garden landscape a solemnity and elegance.
Technique # 3 - Classic Topiary
Of course, the ancient Roman gardeners could not even imagine how much modern society would transform classical park art, similar in its design to sculpting. Indulging in the topiary, they did not at all try to speed up the process of creating a living sculpture, on the contrary, they found charm in a leisurely search for the ideal shape. If the classical approach is closer to you in spirit, then you can make a topiary as the Romans did it, and behind them gardeners of the 18-19 centuries. What is needed for this? A lot of patience, imagination and a well-honed tool: garden or hedge trimmers, delimbers, pruning shears, wooden slats.

The combination of trimmed curbs and topiary in the form of pyramids clearly separate the lawn from the track
Here are some tips for making a classic topiary. It is best to start “sharpening" mastery on simple geometric shapes. Moreover, a simple three-dimensional figure can easily be complicated by transforming it into another - turn a cube into a ball, a cylinder or a pyramid - into a cone.

Pyramidal topiary towering against the background of spherical bushes create an unusual contrast in shape and color
Topiary simple geometric shape
You need to start by identifying the “patient” for your first exercises. So, we are going in search. Your goal is a tree or bush 5 years of age or older, with a well-developed root system and crown, larger than the intended size of the figure. Good options for making a topiary, choose from plants such as common or prickly spruce, cotoneaster brilliant, purple vesicle, cirrus cirrus notched, Tatar maple. It is better to carry out a topiary haircut in March or April, or from June to August, but not in the fall, so as not to weaken the plant before wintering.

Topiary irregular geometric shapes have been created over the years - they require painstaking trimming of the crown as it grows.
Here is a step-by-step instruction that will help you complete the cube topiary:
- On the ground, under the crown of a tree, draw a square with the desired length of the side of the cube.
- At the corners of the square, install wooden slats or bamboo poles with a diameter of 2-3 cm and fasten them with horizontal cross strips - this will be your reference frame.
- Using a hedge trimmer, perform a rough haircut, outlining the approximate contours of the figure - start from the top face, then process the side ones.
- After checking the sides of the cube for curvature, correct the planes and proceed to the final haircut, gradually equalizing the volume.
- Finish the stroke with a secateurs, removing small twigs that are knocked out of the total mass.
It's important to know! Periodically move away at a distance of 3-4 meters from the topiary to evaluate the correctness of the shape from afar.

Arbor of grapes harmoniously exists next to an unusual landscape created using topiary on the lake
Complex topiary
A topiary in the form of a ball can be made of a cube, truncating its faces. The most suitable plants for spherical topiary: purple willow, Thunberg barberry, cysticis, Western thuja, gray spirea, common spruce, yew, boxwood and many others.

Spherical topiary molded from a standard tree will look spectacular in both regular and landscape landscapes
Cylindrical topiary, as a rule, can be easily made from Western Thuja, a variety of which naturally has the shape of a column. Good cylinders can also be obtained from European larch, round-leaved cirrus, small-leaved linden. The principle of shearing the topiary in the form of a column is the same as the cubic one. Draw a circle under the crown of the tree, set the guide wooden stakes, and already bolder than the cube you conquered, cut the cylinder.
Topiary in the form of a cone and a truncated cone look good. In order to build a frame for a cone-shaped topiary, dig at least three poles and fasten them in the center, in the place of the imaginary top of the future cone - like an Indian wigwam. Again, nature itself comes to the rescue of beginning topiaries, creating the western one with the conical crown shape “smaragd”.

Shearing a topiary in the form of clouds or “pompons” creates the effect of a landscape of extraterrestrial origin

Topiary in the form of cones or columns can serve as an excellent setting for a green path leading to a fantasy arch
By training your hand hardness, you can try your hand a little later in performing pyramidal topiary with three and four faces, arranging a mini-complex of Egyptian pyramids in your garden, giving your site a completely unique look. Bringing your skills to perfection, you will smoothly move on to the creation of such complex green sculptures as a spiral, tiered geometric volumes and their combinations, and not far off - to the figures of animals and people.

Thanks to a modern vision, topiaries are taking on increasingly complex and unexpected forms.
Classic topiary with frame
The clipping process of the classic topiary will greatly simplify the removable metal frame, which is hoisted over the crown of a tree or bush. Such an auxiliary element is used to make it easier to make a topiary with your own hands and is the best suited for beginner topiary.

The easiest option for a beginner topiary is to create a green ball from a boxwood bush planted in a pot

A separate direction in topiary art is Japanese nivaki, which is a haircut of the crown of trees in the form of clouds
The plant "lives" in a mesh robe, adapting to a given shape, and you just have to cut off the naughty branches, breaking through in spite of the imposed growth trajectory. At the end of the formation of the crown, the frame is removed. However, many gardeners disagree with this approach to how to make topiary - the plant is inclined to grow together with its “outfit” so that it cannot be removed without damaging the crown.