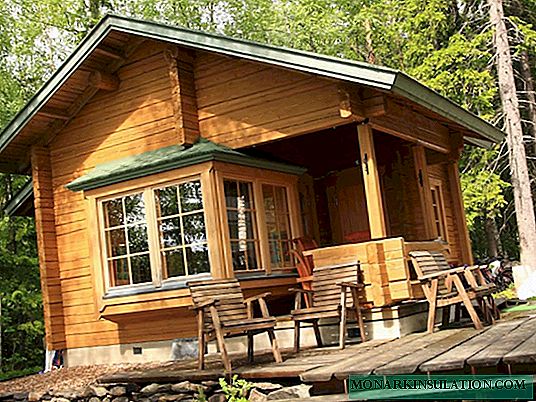
The beginning summer resident, who has just bought a land plot, has to think about building a small house. The choice of building materials is made taking into account the financial resources available to the developer. Low-budget projects are being built using frame technology borrowed by Russians from Western builders. Additional savings can be obtained if you build a frame summer house with your own hands with the help of one or two assistants with a daily fee. This technology of building houses also attracts with the speed of assembly of the structure. In a few weeks, you can build an object, and after finishing work, start to operate it. Wall structures, facilitated by the use of modern insulation, do not require a powerful foundation. The multi-layered construction of walls, floors and floors allows you to hide utilities.
Let's look at the main stages of its construction with our own hands on the example of a two-story frame house. The size of the object is 5 by 10 meters. The thickness of the insulation laid in the cells of the wooden frame is 15 cm.
Stage # 1 - the foundation device of the future home
On the land there was a strip foundation from the previous structure, the dimensions of which were 5 by 7 meters. In order to save materials, the developer decided to use the existing foundation, increasing the area of the house by installing three brick pillars. The result is a combined foundation design, which is 5 meters wide and 10 meters long.
Important! When using the old foundation, it is recommended to free it around the perimeter from the ground half a meter in depth. Apply modern waterproofing compounds to the walls, as well as protect them from the damaging effects of moisture and temperature differences with hydroglass. Then, the basement space is covered with sand, compacted and from above filled with previously excavated soil.
The fertile layer of land located in the area of the foundation is completely removed for proper use in the summer cottage. Instead of this layer, sand is poured, which has good drainage properties. To erect a basement in the foundation, make vents and drill from 9 to 18 holes that are necessary to place anchors with studs in them. After completing all the preparatory work, the foundation surface is treated with a waterproofing mixture, applied in several layers. Hydro-glass isole and a film are placed on top of the foundation so that moisture does not penetrate the base, which was laid out of brick in the course of further work. The height of the base is 1 m.

The foundation device of the frame country house on the basis of the old strip foundation and additionally laid out of brick pillars coated with waterproofing
Interesting too! How to build a country house from a container: //diz-cafe.com/postroiki/achnyj-dom-iz-kontejnera.html
Stage # 2 - installation of the basement
The installation of the basement is carried out according to the platform technology. A 50-ku board and a 10 × 15 cm timber are laid on a strip foundation. Two timber is attached to the brick pillars side by side. For fastening wooden parts, studs mounted in advance for these purposes are used. To give rigidity to the construction of the basement, it is necessary to install two more beams in the center of the house. Thus, the height of the harness is 15 cm.
50-ki boards are laid and secured on top of the harness, keeping a distance of 60 cm between them. A rough floor is filled from the bottom of this design, using 25 mm-thick boards for this. The resulting cells are filled with foam, laid in two layers with a thickness of 5 and 10 cm. The cracks between the foam and the boards are poured with mounting foam, and then an overlay of boards (50 × 300 mm) is arranged on top.

Installation of the base for the construction of the platform is made of timber using anchors with studs fixed in the foundation of the house

The laying of polystyrene plates for warming the floor of the frame house is accompanied by mandatory foaming of tile joints and gaps between the material and the lags
Stage # 3 - the construction of racks and walls
The walls are assembled on the horizontal surface of the mounted floor of the frame house. Then the modules are attached to the lower harness made of timber. The length of the racks of the first floor was 290 cm, taking into account the installation of a 45-cm crossbar. The height of the ceilings of the premises of the first floor is 245 cm. The second floor is built a little lower, and therefore, 260 cm racks are taken. It is very difficult to install the frame racks alone, so an assistant is involved in this work. For a week they carry out the installation of corner and intermediate racks of both floors, all floors and crossbars.
Important! The corner posts with the upper and lower piping are connected using 5x5x5 cm spikes, as well as metal connectors: brackets, plates, squares, etc. Make sure that the surfaces of the corner and intermediate posts are in the same plane within the same wall. The fulfillment of this requirement will facilitate the further installation of the casing, both internal and external.

Installation of the frame of the walls of a two-story country house is carried out by installing racks, strengthening their position with the help of slopes and horizontal crossbars
The distance between adjacent racks of the frame depends on the width of the insulation selected for installation in the piers. Taking this requirement into account will save the builder from the need to cut insulation, which will affect not only the speed of this stage of work, but also the thermal insulation of the facility as a whole. After all, any additional seams increase heat loss. In this project, the racks were installed at a distance of 60 cm from each other.
Stage # 4 - frame reinforcement and crossbar assembly
Wall frames need reinforcement by mounting braces and braces. The role of these elements is great, as they give the frame of the house spatial rigidity. The frontal notch is used when connecting struts with struts and strapping bars. Half-felling is used when attaching braces. Although you can carry out this operation with the help of nails and bolts. Within one wall of the frame house, at least two struts must be installed. A larger number of these parts is taken if excessive demands are made on the power stiffness of the frame being erected. The final rigidity of the frame structure will be given by:
- overlapping;
- internal partitions;
- outer and inner lining.
Carrying out the construction of a country house in two floors with the need for the installation of large floors, it is necessary to take care of the crossbars. Thanks to the crossbars, it is possible to ensure the strength and rigidity of the logs laid on the second floor, as well as to exclude the possibility of their deflection during the entire life of the structure. At this facility, the crossbar is constructed in layers, each of which consists of three 50-mm boards of the required length, fastened together on the sides by 25-mm boards, launched at an angle of 45 degrees and directed in opposite directions. The design is very strong and reliable.

Crossbar support in frame construction. The crossbar is necessary for laying logs of the second floor involved in the installation of a solid floor
The horizontal crossbars are installed above the windows and doors, thereby limiting the height of the frame in these places. These elements, along with their main function, serve as additional amplifiers in the power scheme of the wooden frame. For each window opening, it is necessary to install two crossbars, and for doorways one at a time.
Veranda at the cottage frame type. A step-by-step example of self-construction: //diz-cafe.com/postroiki/veranda-na-dache-svoimi-rukami.html
Stage # 5 - installation of the roof truss system
The construction of the roof is carried out according to the drawing developed in advance by the developer. The drawing allows you to make an accurate calculation of all the necessary building materials for the installation of the roof truss system, as well as the materials that go to the device of the roofing cake (rough coating, vapor barrier, waterproofing, finish coating, etc.). Installation of the roof, consisting of four bevels running at an angle of 45 degrees, together with an assistant can be completed in a week. The height of the roof above the attic floor is 150 cm. The roughing of the bevels is made from a 25 mm board. Then, ICOPAL insulation is attached to the rough coating, and in some places it is replaced with the usual roofing material, nailed to the base with nails (40 mm).

Installation of the rafter system for the selected type of roof and laying of the rough coating of edged boards having a thickness of 25 mm
It is recommended to purchase Finnish roofing material, which is only slightly more expensive than domestic counterparts, but lighter and stronger on kink.
Stage # 6 - covering the outer walls of the frame
All racks of the frame are sheathed on the outside with an “inch” board, the thickness of which is 25 mm and the width is 100 mm. At the same time, part of the casing is attached to the frame at an angle, which makes the construction of the house even stronger. If the developer is not constrained in the means, then the cladding is better to produce from cement-bonded particleboards (DSP) or other plate material. When working in cold weather, it is recommended to tighten the roof and window openings with plastic wrap until the installation of double-glazed windows and the flooring of the roof covering.

Installation of external cladding begins on the front side of the house, then they switch to the sides and finish work on the rear wall, saving lumber
Stage # 7 - roofing and siding installation
The roof of the two-story frame house is covered with flexible bituminous tiles "Tegola Alaska". When performing work, an employee is also involved. The entire roof area of the house 5 by 10 meters requires 29 packs of soft roofs. Each pack is designed to cover 2.57 square meters of roof. Two workers can lay up to six packs of soft roof per day.

Laying soft roofs using Tegola bituminous tiles. Installation of a gutter system for collecting and draining rainwater
To carry out external cladding of the house, a siding manufactured by Mitten is purchased. With the help of skillfully combined colors Ivory and Gold, it is possible to give an unusual design to a country two-story house. Mitten Gold siding is used to decorate the four corners of the house, as well as the walls under the windows. As a result, it is possible to obtain an interesting pattern that gives an unusual and stylish look to the entire structure. Facing is carried out in several steps:
- Before installing the siding, the house is wrapped with Izospan wind protection;
- then they fill the crate using 50x75 boards for this (step - 37 cm, thickness of the ventilation gap - 5 cm);
- in the corners they are fixed in size 50x150 mm;
- after which the siding is fixed directly in accordance with the manufacturer's instructions.

Installation of the external cladding of a house from siding is carried out within a few days by two workers using a metal tour purchased in a store or rented
Stage # 8 - laying of insulation and inner lining
Wall insulation of a two-story frame house is carried out from the inside using mats made of synthetic winterizer and rolls of the Shelter EcoStroy brand. Roll material without unnecessary joints is included between the racks of the frame to which it is attached with a construction stapler. The insulation is recommended to be fixed to the details of the frame so that the material does not settle during the operation of the house. To insulate the attic flooring, ecowool is used, which differs from other types of insulation with enhanced soundproofing properties.
For the inner lining of the wooden frame, tongue-and-groove boards are acquired, which are nailed to the posts with nails so that an even plane of the wall is obtained. It is forbidden to allow gaps between the cladding parts, otherwise the walls will be purged. Next to the flat wall are attached sheets of drywall, which are pasted with wallpaper. You can replace drywall with wood fiber boards or other sheet materials.

The selected insulation is laid in the cells of the wooden frame from the inside of the room, while the joints of the sintepon plates are glued with construction tape
List of consumables and tools
During the construction of the frame summer house, the following tools were used:
- Hitachi 7MFA circular saw;
- saw "alligator" PEL-1400;
- Bort 82 Planer;
- building level;
- screwdriver;
- hammer and others
The materials used were timber, edged boards, tongue-and-groove boards, drywall, insulation, fasteners: nails, screws, metal connectors, etc. Rehau double-glazed windows were inserted into the window openings. All wooden details were processed with the Snezh BIO antiseptic. During the construction of this facility requires the construction of scaffolding, as well as the purchase of metal tours.

The construction of scaffolding - an auxiliary structure necessary for the installation of roofing, wind protection, battens and other works carried out at heights
Knowing how difficult it is to build a country house with your own hands, you can consciously make a decision about the start of work. Perhaps, in your case, it is easier to find a team of builders who are aware of the construction of frame houses firsthand.


